Post by whisper on Jan 26, 2008 11:33:09 GMT 7

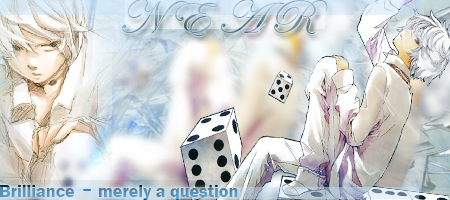
The should be result.
Well here I go. I'm not accustomed to making tuts, I just do the sig making so bear with me here xD. Shiraishi wanted a tut of this sig, so blame him if you don't like it

Okay first off choose a render. Here's mine, Nanao Ise from the anime Bleach.

Now open a new file with the sizes to your liking. Here I chose 390 x 110.
Start off with a black and white gradient. Something like this.

Okay, now go out to the wonderful world of the internet and choose a simple stock photo.
Here is my stock of choice.
i28.tinypic.com/2le5pqt.jpg
(It's supposed to be mud under water, found it somewhere on Deviantart.)
Okay now put your stock over the gradient and put it on overlay.

Now duplicate the stock twice leaving the duplicated layers on overlay.

Okay now choose another stock. This was my stock of choice:
i29.tinypic.com/48ki.jpg
Be sure to choose something that goes with your render, like I did. She was in a bath, so I chose a water stock... yeah you get the gist of it.
Okay now place your new stock over everything else and set it to soft light.

Alright now, make a new layer, and add a pattern to it. (Shift + F5)
(If you don't have any customs patterns, just go to Deviantart, search Photoshop Patterns and download some. Or you could make your own but I forgot how, so bleh xD)
My pattern of choice.

Okay now set it on overlay and bring the opacity down to 50%. Then take out your eraser, choose the Soft 100 sized brush, and erase some parts of the pattern. To get something like this.

Now for the dots! Choose a color any color, particulary one that goes with your render, Nanao's in water, and generally the color of water seen is blue, so i chose a dark bluish kind of color. Now that you have your color make a new layer and take out a 21 pixel soft sized brush and randomly put dots over the sig, not too much though.

Now put the blend mode for the dotties on color dodge.

Okay now, new layer. Now take out a spatter brush and put it at the bottom of the sig. Something like this.
(Again, Deviantart is a great source for spatter brushes if you don't have any)

Now take out the smudge tool. (It's under the eraser) and smudge the spatter brush a little bit.

Okay now put the smudged spatter brush on linear dodge.

Alright now is the time we get to use our render. Hoorah! Now place your render on top of everything else.

Alright now duplicate your render two times so that you have a total of three. Now take the very bottom render and use a blur filter, gaussian blur, and set it to around two. And then use the smudge tool and smudge the edges of the render.

Okay now set its opacity to 60%. Okay now move on to one of the duplicated renders, don't do anything to it, just set it to 80%

Now for the last copy of your render. Just set it on overlay and put the opacity down to 80%

New Layer. Okay remember how earlier we did the whole spatter brush thing with the smudges. Yeah do that again.

Now set it to linear dodge.

Alright new layer, now add another pattern, take out another soft brush and erase some of it again. Now set the pattern to soft light and bring the opacity down to 50%

Okay just to add a little depth to it, I made a new layer, filled it with black, set it to soft light and brang the opacity down to 50%

Alright now new layer. Now go to Image > Apply Image. Duplicate that applied image a couple of times, however many times you want.
Now take out your rectangular marquee tool, and cut out parts of those duplicates. Like this.

Now put all of those cut-out parts to soft light or overlay, whatever you prefer.

Alright now new layer again. Go to Image > Apply image. Now go to filter > blue > gaussian blur. Set it to two pixels again. Then erase some of it, particulary where the render is and some parts around it.

Okay now set it to soft light and add your border.

Now just add your text, I just added simple white text, arial font, put a white stroke to it and set it on overlay. And done.
Have fun with it, hope it works